ON THIS PAGE
SmartSpace.ai Workflows & Use Case Setup
Guide to setting up use cases in SmartSpace.ai: Data space creation, workspace configuration, access control, and testing for precise contenSmartSpace.ai Workflows & Use Case Setupt generation.
Workflows – Setting Up a Use Case
-
Setting Up a Use Case
Overview
Setting up a use case in SmartSpace involves designing a workflow that addresses a specific business need or process. This could range from simple tasks like automated responses to more complex operations like generating reports, handling customer inquiries, or integrating data across systems. The flexibility of SmartSpace allows you to create tailored solutions that align with your organisational goals.
Steps to Set Up a Use Case
1. Define the Objective
Start by clearly defining the objective of your use case. What problem are you trying to solve? What outcomes do you want to achieve? Having a clear goal will guide the design of your workflow and ensure that it meets the necessary requirements.
Example Objective: Automate the process of responding to customer support inquiries using a knowledge base.
2. Identify Key Inputs and Outputs
Determine what inputs your workflow will need and what outputs it should produce. Inputs might include user queries, files, or data from connected systems. Outputs could be responses sent to users, data updates, or reports generated.
- Input: Customer support query.
- Output: A detailed response pulled from the knowledge base.
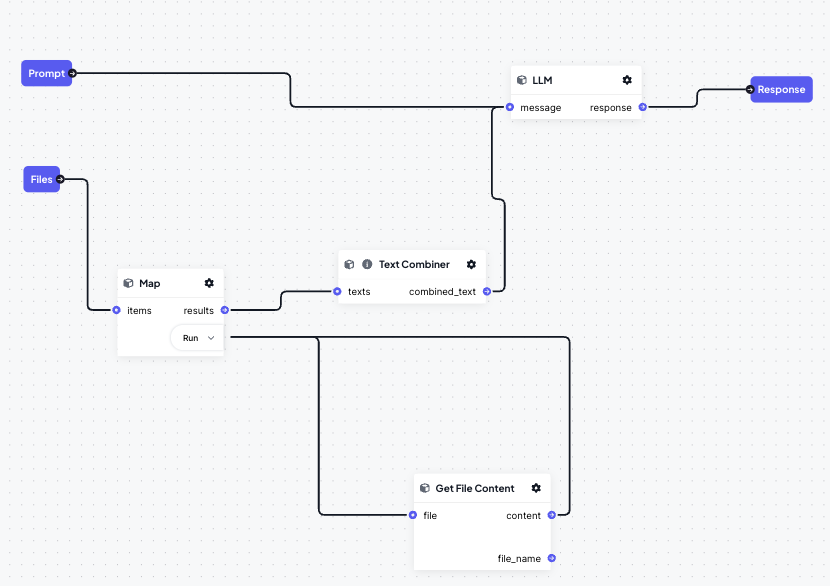
3. Select and Configure Blocks
Choose the appropriate blocks from the Workflow Designer to handle your inputs and generate the desired outputs. Depending on the complexity of your use case, you might use a combination of blocks such as LLM With Tools, Vector Search, Analyzer, SQL Server, etc.
Configure each block according to the specific needs of your use case. This might include setting up connections to external data sources, defining logic within the blocks, or specifying parameters for tools like LLMs or databases.
Example:
- Use an LLM With Tools block to interpret customer queries.
- Implement a Vector Search block to pull relevant articles from the knowledge base.
- Utilize an Analyzer block to construct a coherent response.
4. Design the Workflow
Use the Workflow Designer to visually lay out the flow of data between blocks. Connect the inputs, blocks, and outputs logically, ensuring that data moves correctly through each step of the workflow.
Consider any conditional logic or decision points that might be required, such as routing queries based on keywords or returning different types of outputs depending on the input.
5. Test the Workflow in the Sandbox
Once your workflow is designed, test it in the Sandbox. Send various inputs through the workflow and observe the outputs. Use the Debugger to track the flow of data and identify any issues or areas for improvement.
Make any necessary adjustments based on your testing. This might include fine-tuning block configurations, adding error handling, or optimizing the flow for performance.
6. Deploy the Workflow
After successful testing, deploy your workflow for live use.
Ensure that the workflow is properly documented and that relevant stakeholders are informed about its deployment and operation.
7. Monitor and Optimize
Continuously monitor the performance of your workflow once it’s live. Use the Debugger to check for any errors or inefficiencies and make adjustments as needed.
Gather feedback from users or stakeholders to identify areas where the workflow can be improved or expanded to meet additional needs.
Example of Continuous Improvement:
Over time, you might add new blocks to the workflow to handle additional types of customer queries or integrate with new data sources as your knowledge base grows.Best Practices for Setting Up Use Cases
Start Small and Expand: Begin with a simple version of your use case and gradually add complexity as you gain confidence in the workflow’s performance.
Leverage Existing Resources: Utilize existing blocks and templates where possible to speed up the setup process and ensure consistency.
Document Every Step: Keep detailed documentation of your workflow’s design, configuration, and any changes made during testing and deployment. This will help with troubleshooting and future modifications.
Engage Stakeholders Early: Involve key stakeholders in the design and testing phases to ensure the workflow meets their needs and expectations.
Plan for Scalability: Consider how your workflow might need to scale in the future. Design with flexibility in mind so that you can easily add new features or handle increased demand.
You may find these additional articles on Workflows useful: